Blossoms (20″ diameter rings)
Each 20” ring requires 1/2 yd (or 2 fat quarters) of fabric.
Background requires 2yds. Example is 40”w x 70”l. Make it larger if you wish!
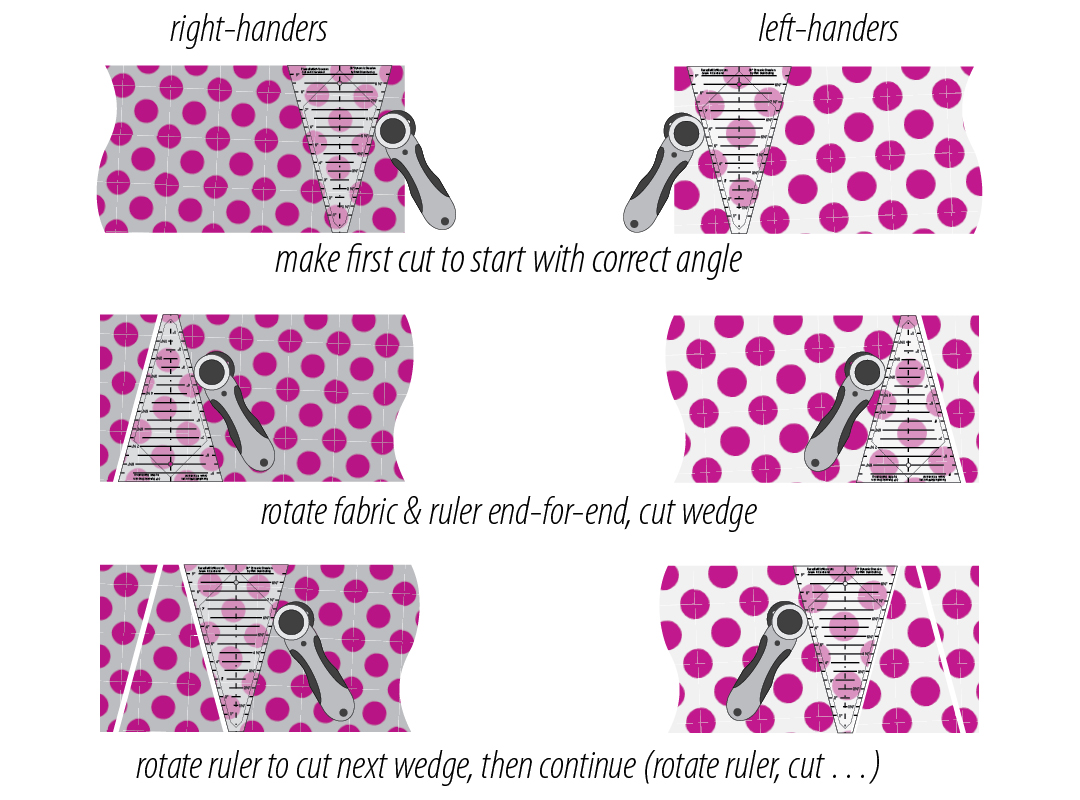
• For each ring, cut (3) 91/2” x 18” strips of Dresden fabric, then cut (12) wedges for each ring as shown.
• Fold wedges lengthwise right sides together and stitch across the wide ends with 1/4” seam allowance and 1.5mm stitch length. Leave thread tails of at least 1/4” at the fold.
• Finger press seam open and flatten the “little hat” or triangle at the point. Turn point right side out and gently use pointed tool to create a sharp point. Press.
• Repeat for narrow ends and remaining wedges.
• Sew wedges side-by-side back-stitching at beginning and end of each seam. Press seam allowances to one side. Twelve wedges are needed for each ring.
• Layer quilt top/batting/backing and quilt the quilt.
• Place Dresden rings on the quilted quilt anywhere you wish and stitch in the ditches through Dresdens and the quilted quilt. After stitching a Dresden ditch, fold back a point, then stitch on the quilt over to the next
ditch, stitch that ditch and repeat. Only one start and stop is needed for each ring!
• Bind and label your quilt.


Innovative projects and fantastic tips are available in Susan K Cleveland’s
Dynamic Dresdens(TM) book and on PiecesBeWithYou.com.
You’ll learn to:
• Turn points with the patented Prairie Pointer tool.
• Stitch wedges to a fabric foundation to create flat, more accurate units
• Eliminate background fabric from shadowing through Dresden fabrics
• Construct pieced wedges with immaculate intersections
• Add piping to pieced wedges
• Interlock Dresden rings for a 3-D effect
• Integrate partial units into background piecing
• Build waves and loopdie-loops with double-pointed wedges
• Design your own Dresden in the size you choose
• Create a flat, square quilt with beautiful binding
• Finish with the “Dresdens over the edge” technique
